


Fully encrypted Arch Linux in Dual Boot with macOS on a MacBook Pro Mid-2014 - Part 1
MacOS Steps, Starting Arch Installation and Configuring Wireless Adapter

In this multipart guide, I’ll walk you through how I Installed Arch Linux alongside macOS on a MacBook Pro Mid-2014 with full disk encryption.
If you’re interested in why I took this challenge and why I believe its valuable exercise for those looking to deepen their Linux expertise, check out my previous blog post: Deepening My Linux Skills: From macOS to Arch
Navigation:
[This one] Part 1 - Preparing MacOS, Starting Arch Installation and Configuring Wireless Adapter
Notes:
Feel free to ask questions or offer improvement/suggestions in the comments!
While this guide applies specifically to a MacBook Pro Mid-2014, most steps probably apply to other Intel-based Macbook (and even other brand laptop/machine)
Not interested in dual-boot? You can still follow these instructions. I will mention any differences when needed.
If (like me when doing this for the first time) you are not sure what you’re doing, there’s a (small) chance that the installation goes wrong and the laptop ends up in a non-bootable state. If this happens at any point, fear not, it’s always possible to recover it. In the worst case, you can follow Apple instructions to reinstall MacOS and factory reset the device.
To complete this guide, you’ll need:
The laptop
A spare USB stick (not sure what’s the minimum required size, but 1GB is probably enough)
A wireless connection
Patience and courage! 😃
⠀Without further ado, let’s dive in!
MacOS Steps
Prepare a bootable USB drive with Arch Linux ISO
(this step doesn’t necessarily need to be done in MacOS, but rather in any machine)
Download the ISO from the official Arch Linux site: https://archlinux.org/download/. At the time of writing, 2024.11.01 was the latest version.
Create a bootable USB with the ISO. I used Ventoy, which was already set up on my USB (see instructions here), but there are other methods at the same link.
Update Firmware and Set Startup Chime Volume
If you are not going for dual boot and plan to remove MacOS completely: do these steps now as they require macOS
Firmware: The only way to install MacBook firmware updates is using MacOS Software Update tool and Install all the updates available.
Startup chime volume: Likewise, the only (easy) way to set the startup chime volume is set the general volume level in MacOS.
Backup Color profiles
If you are not going for dual boot and plan to remove MacOS completely: do these steps now as they require macOS
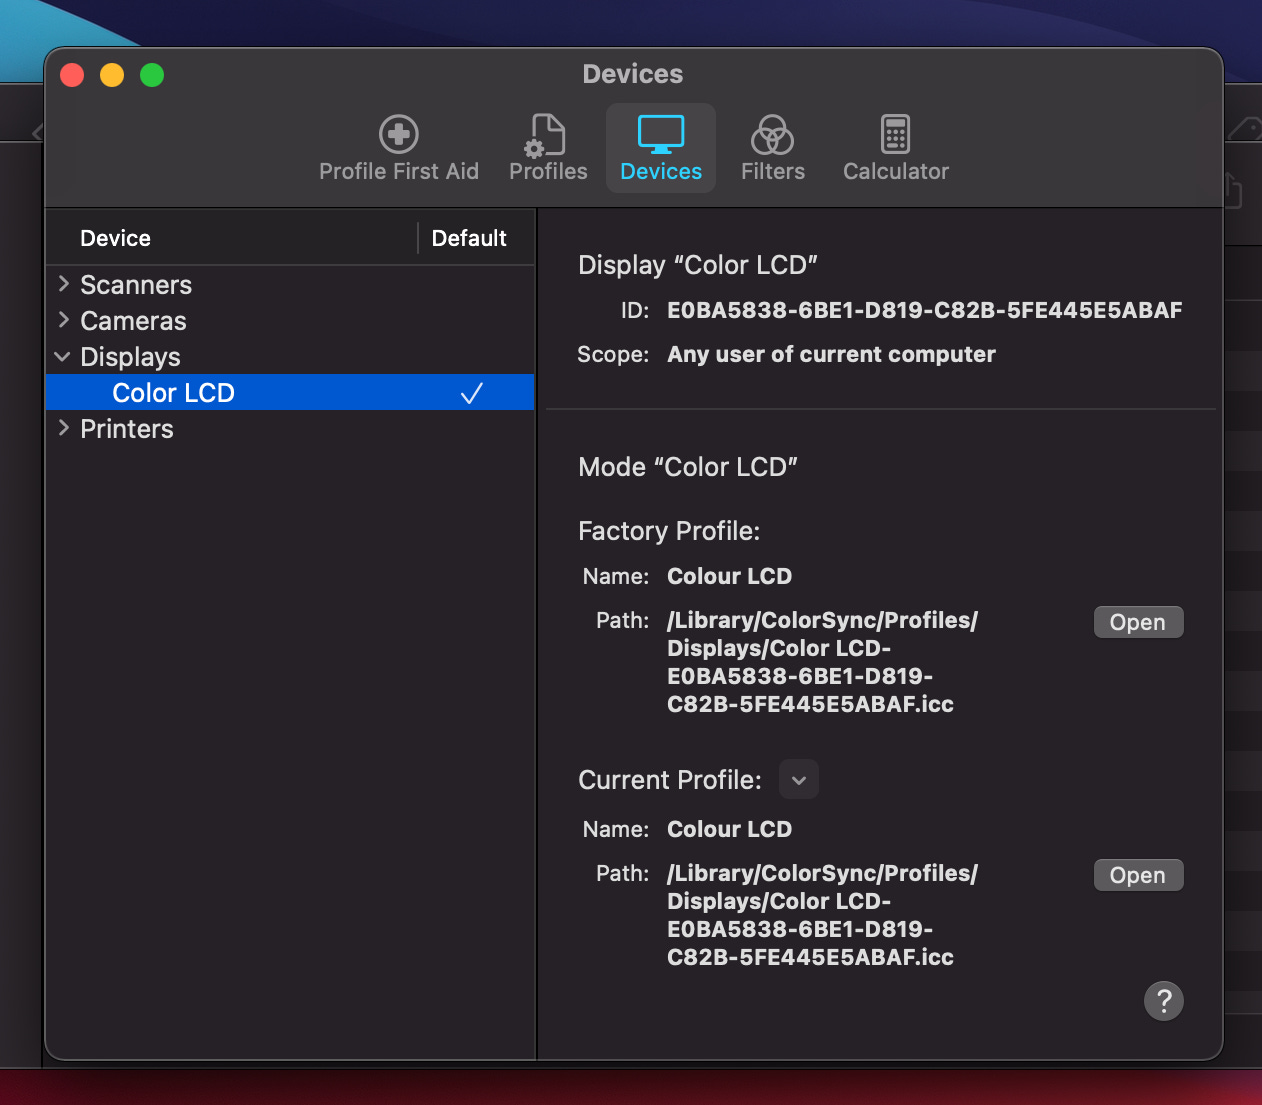
For accurate color adjustments in Linux, backup the files on /Library/ColorSync/Profiles/Displays/*
You can also verify the currently used Profile by opening the ColorSync Utility app, going to the Devices tab and choosing Displays -> Color LCD:
Shrink MacOS partition
If you are not going for dual boot and plan to remove MacOS completely: you may skip this as you’ll be erasing macOS entirely once we boot into the Arch Linux live USB stick.
To create space for Arch Linux, we need to shrink the MacOS main disk partition. The actual partition sizes are up to you. For my 256GB drive, I chose to shink MacOS to 150GB, leaving 100GB for Arch Linux:
Temporarily disable Filevault in
Settings -> Security & Privacy -> Filevault. After MacOS partition has been resized, you can re-enable it.

[Optional] You can see the true partition structure by opening a terminal and using the
diskutil listcommand. This is what mine looked like: a ~200MB EFI system partition and a ~250GB APFS partition for MacOS. The latter is the one that I resized.

For the actual resize, open the Disk Utility app and in dropdown at the top select
Show All Devices

With the main disk selected (
APPLE SSD SM...in the image above). press thePartitionbutton on the top right and resize the main partition to the new desired size (150GB in my case):

Press
Apply, read the confirmation dialog carefully and, if you agree, pressPartition

When finished, this is what my disk looked like:

And that’s it. You may have noticed that we didn’t care about the new partition (the ~100GB one) type, name, etc. Fear not. We’ll handle partitioning specifics for Arch once we’re booted into the Arch Linux live USB.
Main Installation - Arch Linux live USB stick
Now that we’re set up on macOS, it’s time to boot from the USB stick and continue with installation.
Booting from the USB stick
Insert the stick into a free USB port and shutdown the laptop
Power it back on by pressing the power button. As soon as you release the power button, hold down the Option (⌥) key until the Apple logo appear. Wait a bit more and you’ll be shown a menu with the boot options.
Choose your USB device and after a while you will be greeted into a Arch Linux terminal session
Configuring the Wireless Adapter - First challenge!
During my installation, I can say everything went smoothly… Up until this point.
Arch Linux requires an internet connection to install, but this specific Macbook Pro model lacks an ethernet adapter. It’s equipped only with a Wireless Adapter. Specifically, a Broadcom BCM4360 Wireless Adapter. Which is not recognized automatically by Arch.
I could “cheat” and plug a USB Hub with a ethernet adapter (and in fact I tried and it would’ve worked). But that would be avoiding a challenge instead of solving it. And the purpose of this project is, after all, to learn.
Well… I can say “solving” the challenge instead of “avoiding” it took me a good couple of hours to figure out. But I think it was worth it! Who knows it will save someone else a few hours:
Confirm if the wireless adapter is recognized (you may have a different model which works out of the box). Run
ip link show. If the output contains a single interface, the loopback interface device, which looks like:1: lo: <LOOPBACK (...), the adapter isn’t detected.Identify the Wireless Adapter model (again, you may have a different model) by listing all PCI devices:
lspci -nn. Look for a line with “Network” in the name. Mine looked like this:03:00.0 Network controller [0280]: Broadcom Inc. (...) BCM4360 802.11ac Dual Band Wireless Network Adapter (...)Remove any potentially conflicting kernel modules (run each commands in sequence):
$ rmmod b43
$ rmmod ssb
$ rmmod bcma
$ rmmod wl
If any of the above commands fails with Module X is not currently loaded it’s OK to ignore. It just means the module was not loaded in the first place.
Load the correct broadcom-wl kernel module:
modprobe wlConfirm the adapter is now recognized by listing the interfaces with
ip link show. A second interface should be there now! Something like:2: wlan0: <BROADCAST (…)
With the adapter recognized we can now move on to connecting the a wirelless network using the iwctl utility:
run
iwctlConfirm the wireless interface is recognized and take note of it’s name (in my case it was
wlan0):station listNOTE: not always, but sometimes no station was shown for me. I would have to exit the
iwctlutility (runexit) and restart the service withsystemctl restart iwd. After this the adapter should show.
Put station in scan mode:
station wlan0 scanGet available networks and confirm your network is listed:
station wlan0 get-networksConnect to your network:
station wlan0 connect "SSID"(SSID is your network name. Quotes are required). When prompted, enter the passphrase.Confirm connection was succesfful:
station wlan0 showexitfrom iwctl.
And that’s it! Confirm connectivity with:
ping www.google.comSynchronize your system clock
Simply run:
timedatectlDisk Partitioning - Second Challenge!
Continues in Part2:
